Thursday, November 12, 2015

Time for Some Real Progress

After some patching and sanding various parts of the car, mainly repairing star cracks, the dear old Bond has sat for some time.

This inaction was principally due to being busy at work with my new freelance design business, Conceptual Voodoo Design Services. Months turned into years before I was finally employed full time by one of my clients, so the car yet again became a priority.


Copious amounts of grinding work to dig out cracked glass

Having money for the first time in years, and with Norm otherwise engaged, I decided it was time to get serious. First, the hideous 1980's glass pop-up sunroof was removed...


Urgh...to the rubbish bin!


The body stripped to the bone (note sanded rear section...so much dust!)...


Good mate Russell unwittingly caught in the action


The engine removed...


And off the little chap went to some new experts for a faster crack at the repairs...


Dan the man, he loves driving my cars around


Advanced Fibreglass Techniques agreed to take on the project, arriving in mid-Winter it was the perfect off-season project for them the while away the months between boats and jet-ski's! It wasn't long before the body was broken down into its major sub-sections, gently sandblasted and work commenced. More to follow.


Bits...everywhere...not quite at ground zero (chassis yet to come apart) but hopefully some form of re-assembly is not far away! Note sanded bonnet standing up rear centre


Rusty rear end ready for sandblasting. Roof hole to be filled in


Rusty bulkhead with BIG windscreen issues (stay tuned)


Tuesday, April 14, 2015

A Screen Too Far

Well, after a long absence it's a little difficult to know where to start dear readers. Suffice to say, there has been periods of sustained sporadic activity over the last 3 years since I last wrote, interspersed with redundancy, starting a new business, other projects, numerous shed clean-outs, you name it. So, where were we...

...that's right, attending to some unfortunate damage at the base of the rear windscreen.

The completion of the right side of the bodywork allowed us to focus on the gutter corner. Applying a level to the area revealed quite a substantial drop at this point, but using a block of wood and a car jack, we managed to get everything back where it should be.

Brackets and a small steel plate allowed us to tie everything together and incrementally fill with glass.


Alignment of the gutters required a lot of brackets and jiggery pokery


Brackets removed, the broken gutter corner can now be filled with chopped glass - note improvised clamps!


Finished the major work, ready for sanding

At completion, everything was now level. Whilst crucial, of course, none of this is terribly exciting, nonetheless a job well done. Let's move on!

With the lower ledge now level, we decided to test fit the rear screen, just in case there were any issues. Here's where something weird happened...the screen that cam with the car appeared inches short each side and featured a notable curve not matched by the bodywork. IT WAS THE WRONG SCREEN!!!

After some furious emailing a replacement screen was located in the UK, and thanks to the generosity of regular parts contributor (more to come), Adrian Schollick, we were back in business. A crate was custom made by sensational packaging experts Universal Packaging, and the screen was on its way to Australia in weeks.


It's here!!!

Once we unpacked the wonderfully protected rear screen, we quickly tested the fitment to make sure all was perfect...only to find it was no different! I put the 2 screens on top of each other for comparison; IDENTICAL!!!

So, I guess now, at great expense to the management, I now have a spare - another lesson learnt in haste and jumping to conclusions. Sigh.


Wednesday, January 4, 2012

Design Influences?


As previously discussed, the most common tale I've heard told in relation to the origins of the Equipe GT's rather unique lines revolves around Bond management's fondness for Trevor Fiore's TVR Trident prototype. Unfortunately, Bond's insistence on retaining the Equipe's Triumph Herald/Vitesse underpinnings, and Fiore's reluctance to alter his design, led to a dead end. Bond's design director, Alan Pounder, was then left to complete the design. One wonders whether Raymond Loewy's Avanti prototypes served as an influence for the bonnet design at least!

Maybe so, maybe not...at least you don't have to squint as hard to see the link as you do with the TVR Trident!

In other news, the GT6 overdrive gearbox obtained some 18 months ago has now finished its extensive rebuild, thanks to Bob Anderson Motors in Kent town. Hopefully it won't have to wait long to be used in anger.

Behold! Better than new

Monday, January 2, 2012

2012: Year of the Bond?

HAPPY NEW YEAR ALL!

With all the bonding over the last 2 years, I was determined to finish the rear 'glassing in 2011 and get off to a fresh start in 2012. It wasn't quite to be, with the hot weather arriving in December and halting any action inside the super hot garage. However, Norm and I did get very close. The goal was to take the repaired body off the chassis over Christmas, flipping the body upside down and starting on the bottom of the car - we're about two sessions away.

Here's an update.

With the floor, rear bumper and left corner quickly in position, it was time to tackle the very ugly right corner which had been substantially damaged in the collision. The worst part was the right lower corner of the rear windscreen, which had been damaged and distorted - leaving it could result in not only an unsightly visual distortion, but also a leaky windscreen. However, the area is very complex.

Top view of the distorted area.

Distorted area removed, a small section of window flange area glued in place

The guttering was removed, a small corner scavenged from another panel to help give us a visual reference to locate all the parts. We found so much needed to be removed, an additional few panels would be required from the UK. Guy came to the rescue once again.

Chipping away at the rest of the fragmented body work, the last pieces of the jigsaw begin to fall into place.

New panels screwed in situ, edges ground back around joints for clean bonding surfaces

Replacement panel extended all the way to the wheelarch metal flange, bonded inside and out

After much bodily contortion inside and under, the right corner is 90% glassed into position and the last major hole in the car repaired. At this stage it really felt like progress was being made.

Fine weave film added to joins for smooth finish, the rear right nears completion

Done. Ugly but effective, the rear quarter awaits sanding - can't wait to get there at last!


Sunday, September 11, 2011

Back to the Back

Well, I'd have been a fool not to think a large percentage of the work on this car would have been focused on getting that decrepit rear end sorted, but I had hoped to include most of it in one thread. However, I was being a tad optimistic.

Having said that, Norm and I have made a LOT of progress, and we're really getting to the fiddly details now. So, let me back-track and update you all on where we're at.

Rear Repair Redux

Once the rear end had been assembled with screws and brackets, like a giant Meccano set, each piece would need to be disassembled and the edges ground back, each side, to provide a clean bonding surface. The resulting 'clean' strip would then provide a bonding area, lay the 'glass mat down each side and apply resin. Simple.

OK, everyone out! All sections removed, edges prepped for re-assembly

We started with the centre pan, bolted to the chassis and tek screwed into position along the rear steel lip (as per original assembly procedure). Fibreglass applied over the top of the lip, once completely finished, we will remove the body and bond (love that pun) beneath.

Centre pan in position

First corner bonded in place, away we go!

After the centre plan was located, each section is screwed back into place, and bonded one at a time, starting with the left corner (easiest and least damaged).

Tape on the outside (green) prevents resin from oozing through.

Inside layer

The large gap at the bottom was filled using core-flute taped to the outside (to provide the subtle curve, tangent with the surfaces we already had). Post 'glassing, fibreglass filler on the outside added rigidity.

Outside layer

Both sides of the repair line must be done to complete the repair. As part of the process, a layer of fine weave material placed over the exterior 'glass mat, to smooth off the surface (reducing sanding mess later on). Then repeat many, many times.

Fine weave material in place. This is Norm's special technique and it works a treat

Enter sandman

The bootlid was kept handy at all times to check alignments, but with so many datums missing, we did find the going tough. However, thanks the the modern miracle of fibreglass, correct was never difficult or impossible.

More to follow!

Friday, April 22, 2011

So...What Happened?

When I purchased the car, I was not given any history. In fact, the wrecking yard had acquired the car in 2001 and listed it as a Financial Write-Off, returning the plates and destroying all documentation. Needless to say, the registration authorities were deeply sceptical until one kind chap took it on himself to research the car, finding it registered in South Australia since almost new, last registered in 1986.

I breathed a sigh of relief, I can tell you.

At this point I appealed to others for information also. A response via the Triumph Sports Owners Association of South Australia mentioned that they had seen the car for sale in the late 1990's (at that stage running quite well apparently), the elderly (original) owner claiming his wife had reversed into a brick wall at high speed!

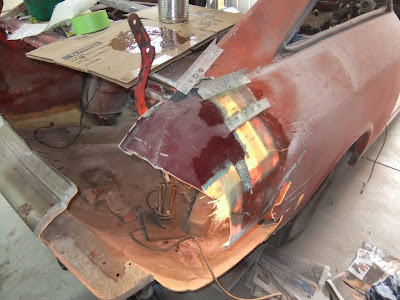
So, that seems to be the reason for all this mess - she certainly must have been travelling!

Tanking It:

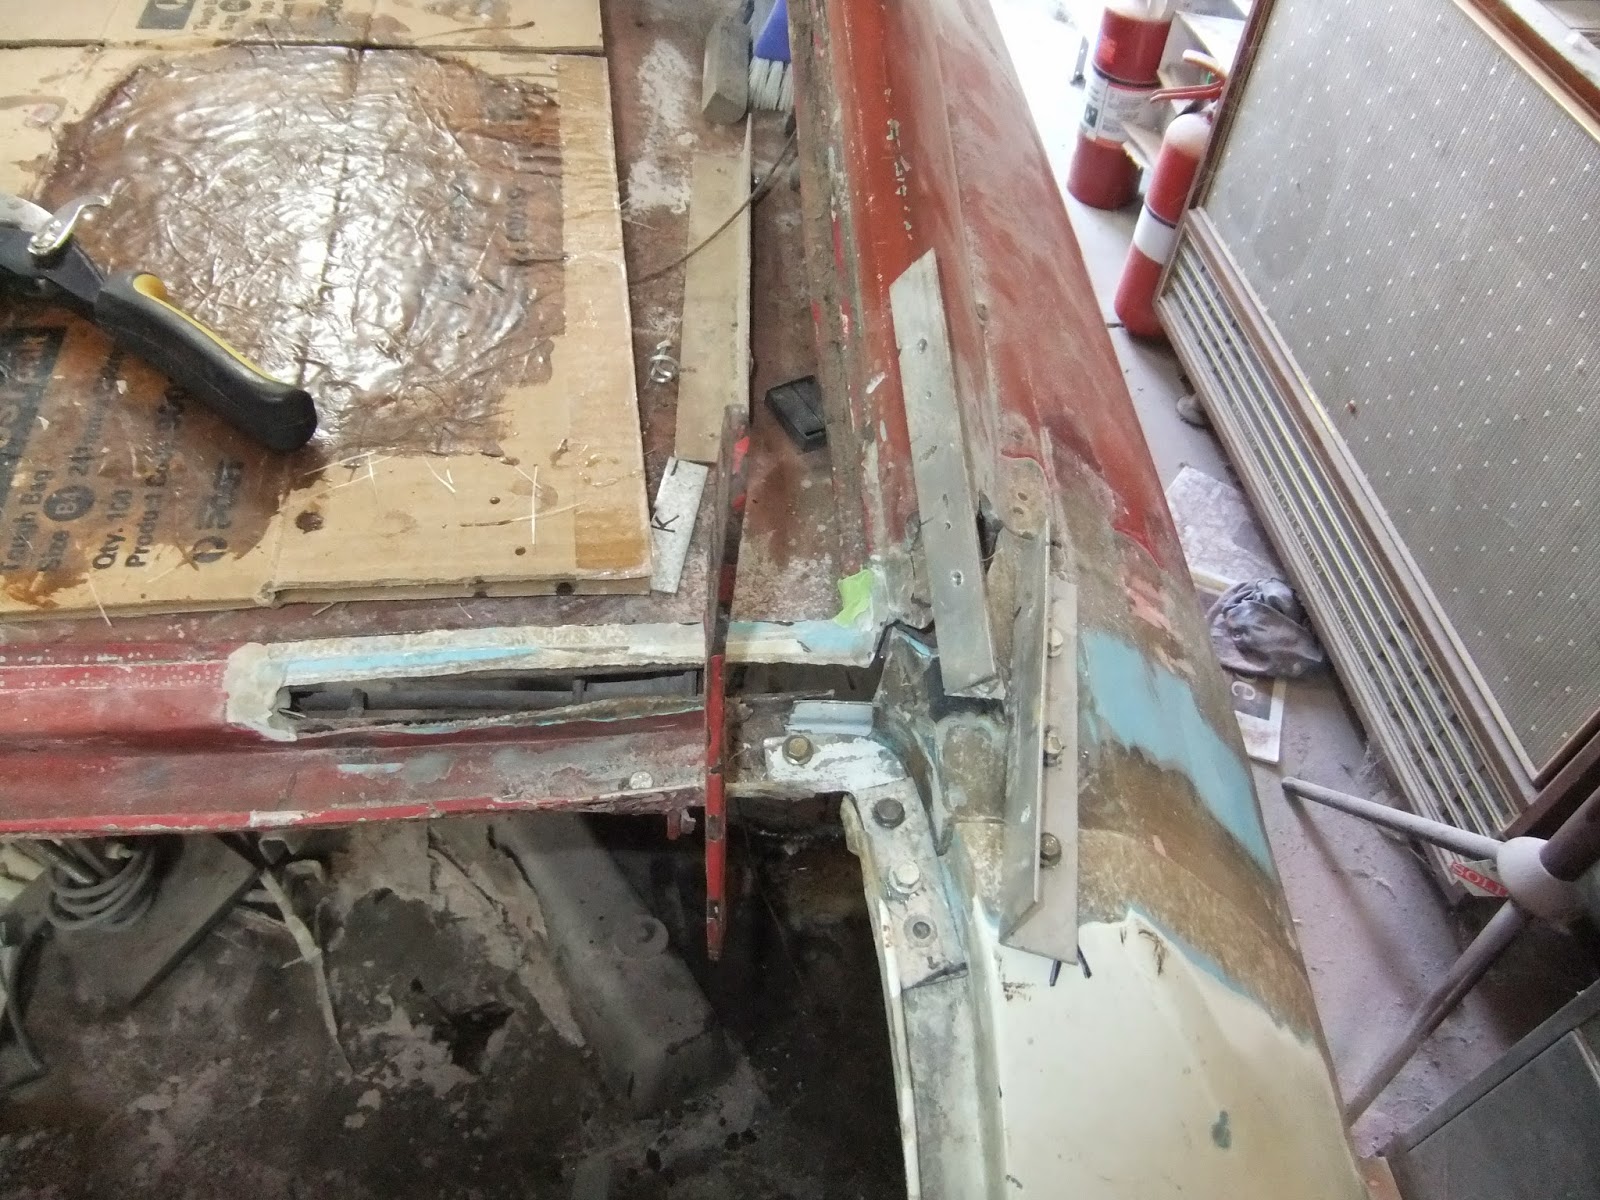
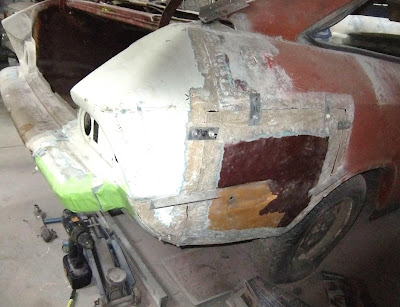
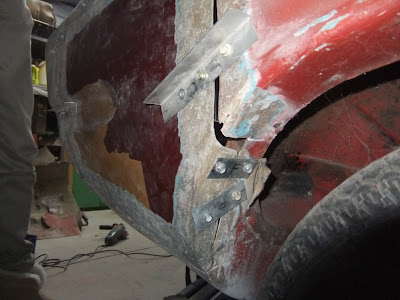
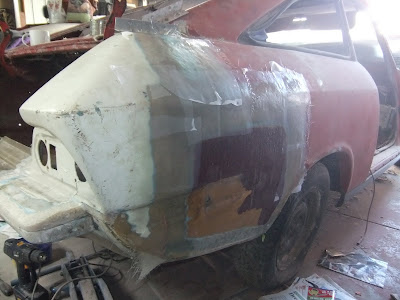
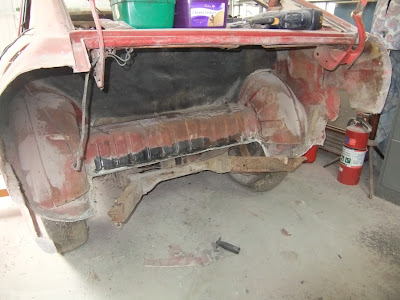
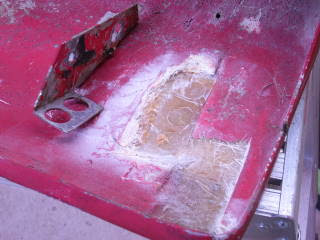
Amongst the last, but certainly not the least of the rear end damage casualties, was the fuel tank. The tank had been partially dislodged in the accident, damaging some of the mounting points and creasing the tank at several points...hence it took about 6 hours to remove it! As the tank came from a Triumph Herald Estate or Courier (Herald Van - extremely rare), there was little hope of finding a replacement laying under a tree, so repair was the only option.

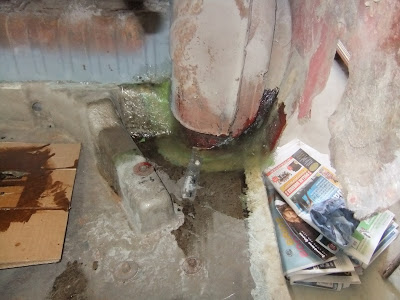
After a 6 hours armwrestle, we extracted this ugly thing

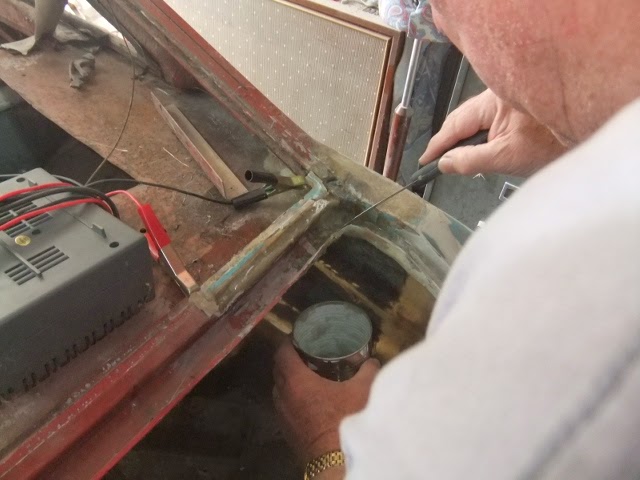
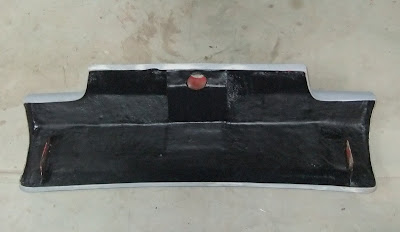
The tank had an ominous looking crease at one point, which had bowed the top of the tank upwards, so that it would not be possible to refit beneath the fibreglass false floor of the Equipe (broken into pieces - another job for Norm and I). Luckily, there was no leak, but would need to be retested after the crease had been pulled out.

Being punted on the seam had buckled the top nicely. In addition to not fitting under the false floor, I'm not sure the fuel sender would read properly - I'd likely be out of fuel constantly!

My first port of call requested $800 to straighten the tank, with no guarantee of successful repair. When I had finished laughing, I had the tank blasted and etch primed, then approached some local panel beaters. No-one was super keen, and I was beginning to despair when I heard of a chap North or Adelaide who repaired motorcycle tanks. One week and $75 later, the tank came back straightened and flat again - not perfectly dent free, but given its location deep inside the boot, I was prepared to let this one slide. No leak, that was the main thing.

Not perfectly straight, but flat and safe - a giant relief

Of course, I'm sworn to secrecy over the repair technique, but suffice to say it was very clever. Very happy with the results for my meagre investment.

About 18 months on, it remains yet to be painted, but there's no rush. The sender was tested and worked fine, the whole lot sits in the garage awaiting re-assembly.

Tuesday, April 19, 2011

Boot the Bond

Whilst all this was going on, the bootlid languished in the rear of the workshop - we'd used it a few times for reference (getting the bodywork in the correct position), but once all that was done, Norm volunteered to take it home to look at the standard of the 'glassing.

The bootlid had obviously sustained a belt in the lower right corner, probably popping on impact (as the aluminium box section housing the latch had partially de-laminated, a hinge was bent, the lower rear windscreen dropped and some cracking evident). Norm got it home and found a lot of cracking.

Star cracking...across the universe.

Hinge removed, so rear could be 'glassed.

Sanding the bootlid back, a lot of talc had been used in the production process - Norm took it back, and back, and back, stopping when he was worried there'd be nothing left! Building the bootlid back up again, a substantial amount of material was added (wait for the bodywork blog entries, they show the process quite clearly), then primed and sanded back smooth. It was a work of art...until it slid out of position tonight and crashed to the floor, taking a few chips out of the 'glass work.

Here's some pics before it hit the floor.

Beautifully sealed underneath, waiting for a fresh coat of red 2K

It has made good reference with one corner of the bodywork now in place - many adjustments to be made, but here's a sneak preview...